











The Media Library is the WordPress “repository” for storing all multimedia files such as images, videos, documents and more. The correct uploading method not only makes file management more organized, but also avoids problems such as website lagging and slow loading. This section will explain in detail the complete process of file uploading, supported file types and precautions.
I. Getting to know the WordPress Media Library
Before you start uploading, understand the basic functions of the media library:

- Login to WordPress backend → Click [Media] → [Library] on the left menu to enter the media library interface.
- By default, the media library displays files in “Grid View” (you can switch to “List View” to see more details such as file size and upload time).
- All uploaded files will be sorted by time (latest uploaded at the top), support search by keywords, filter by date.
3 common methods for uploading files
Method 1: Direct upload via media library (batch upload recommended)
It is suitable for uploading multiple files (e.g. images, documents) at one time with the following steps:

- Go to [Media] → [Library] → Click the [Add New File] button at the top;
- In the pop-up upload screen, you can choose between two methods:
- Drag-and-drop upload: Open a computer folder and drag files directly into the dotted box (supports dragging multiple files at the same time);
- Select file to uploadClick the “Select File” button to check the file you want to upload from your computer and click “Open”;
- A progress bar will be displayed during the upload process, wait for all files to finish uploading (the progress bar disappears);
- After successful uploading, the file will be automatically displayed in the media library and can be used directly.
Method 2: Upload in the editor (suitable for uploading when inserting content)
When writing articles or pages, you need to insert files such as images / videos, which can be uploaded directly in the editor:
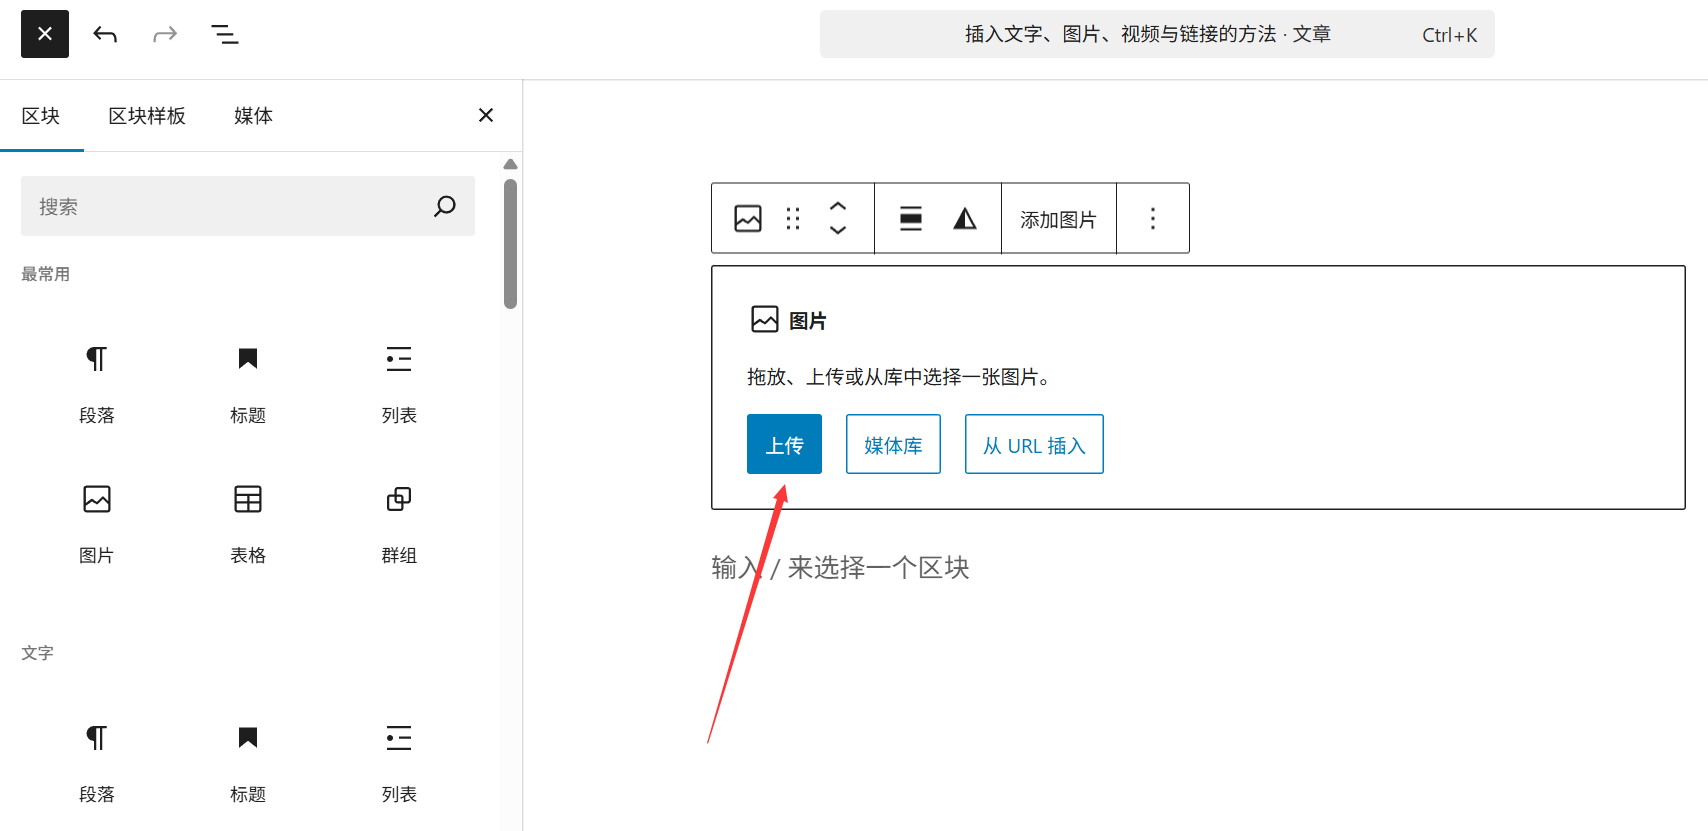
- Enter the article/page editing interface ([Article] → [Add New] or [Page] → [Add New]);
- Position the cursor where you want to insert the file and click on the “Add Media” button at the top of the editor (click on the “+” sign in the Gutenberg editor to search for “Image” “Video” etc.);
- In the pop-up window, click [Upload Files] → Drag and drop or select files to upload;
- After the upload is complete, select the file and click [Insert to Article] in the lower right corner, the file will be directly inserted into the current cursor position.
Method 3: Upload via FTP tool (suitable for large files or bulk migration)
When the file size is too large (e.g., videos over 100MB) or when you need to migrate files on the server in bulk, you can upload them using an FTP utility (e.g., FileZilla):
- Open the FTP utility and connect to your web server (you need to fill in the host address, FTP username and password, which can be obtained in the server control panel);
- Server-side access
/wp-content/uploads/Folders (WordPress' default storage path for media files, with automatic folder splitting by year/month); - Find the file you need to upload on your local computer and drag it to the server's
uploadsfolder; - After uploading, log in WordPress background → [Media] → [Library], click [Synchronize Media Library] plugin (you need to install synchronization plugin such as “Add From Server” in advance), and synchronize the files uploaded by FTP to the media library (otherwise, WordPress will not be able to recognize them).
III. Supported File Types and Size Limits
1. Document types supported by default
WordPress only allows the following common file types to be uploaded by default for security reasons:
- photograph: JPG, JPEG, PNG, GIF, WebP (recommended, smaller size), ICO, etc;
- video: MP4, M4V, WebM, OGG, WMV, AVI, MPG, MPEG, and more;
- sound frequency: MP3, M4A, OGG, WAV, and more;
- Document: PDF, DOC, DOCX, PPT, PPTX, XLS, XLSX, TXT, and more.
If you need to upload other types (e.g. ZIP, SVG), you need to modify the allowed file types through plugins (e.g. “WP Extra File Types”) or code (plugins are recommended for newbies).
2. File size limitations
By default, the size limit for WordPress upload files is determined by two parts:
- Server Restrictions: Most web hosts have a default limit of 2MB-20MB (you can change the “upload_max_filesize” parameter in the “PHP Settings” section of the server control panel);
- WordPress Restrictions: The current maximum limit (e.g., “Maximum upload file size: 8MB”) is displayed at the top of the [Media] > [Add New File] screen.
Beginner's Advice: Try to control the size of single file within 10MB (pictures are recommended to be within 2MB) to avoid slowing down the loading speed of the website. Large videos can be uploaded to YouTube, Tencent Video and other platforms first, and then embedded in the website through links.
IV. Notes on uploading files
- Document name specification
- Avoid using Chinese characters, spaces, special symbols (such as “!” “?”) , it is recommended to use English, numbers, hyphens (-) or underscores (_) for naming (e.g. “service-cover.jpg”);
- File names are as relevant as possible to the content (e.g. “team-member-john.jpg” is more manageable and SEO-friendly than “IMG_1234.jpg”).
- Compress files in advance
- Use tools to compress your images before uploading (e.g. TinyPNG, Figure Good Fast) to reduce the size;
- Video can compress resolution (e.g., from 4K to 1080P) to reduce file size.
- Avoid duplicate uploads
- Search for the file name in the media library before uploading to make sure the file has not been uploaded before to avoid taking up server space.
- Attention to copyright issues
- Uploaded images/videos should be secured with usage rights (free copyright-free material sites such as Pexels, Unsplash can be used) to avoid copyright infringement.
V. Frequently Asked Questions for Newcomers
- Failed upload prompts “file too large”?Solution:
- Compress the file size and re-upload it;
- Contact your server provider to request an increase in the PHP upload file size limit;
- Change to FTP upload (some servers have more lenient restrictions on FTP uploads).
- Can't find the file in the media library after uploading?If uploading via FTP, synchronize with the “Add From Server” plugin; if uploading via the backend, check to see if the date or file type is filtered (click “All” to see all files).
- Prompt “Unsupported file types”?Install the “WP Extra File Types” plugin and check the file types you want to allow (e.g. SVG, ZIP) in the settings.
Knowing the right way to upload will keep the media library neat and tidy while reducing site downtime due to file issues. In the next section, you'll learn how to optimize the images in your media library to further improve site performance.
 English